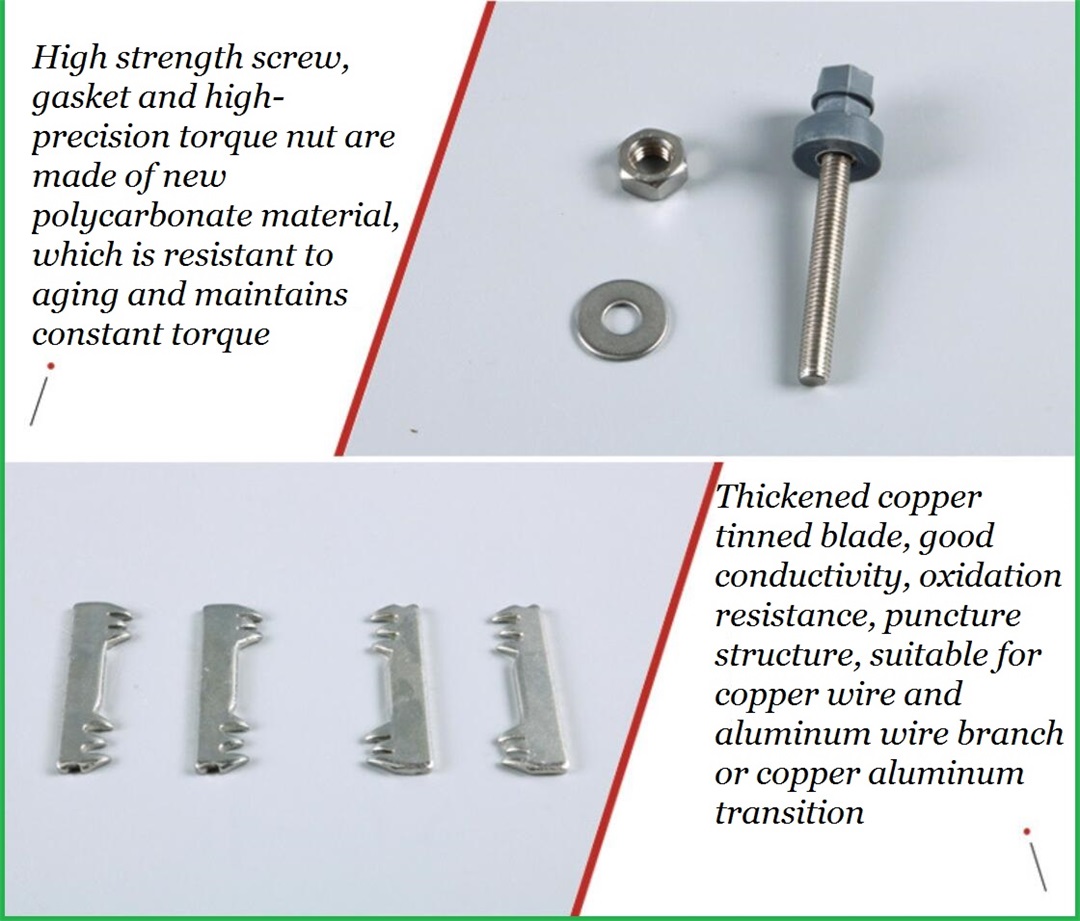
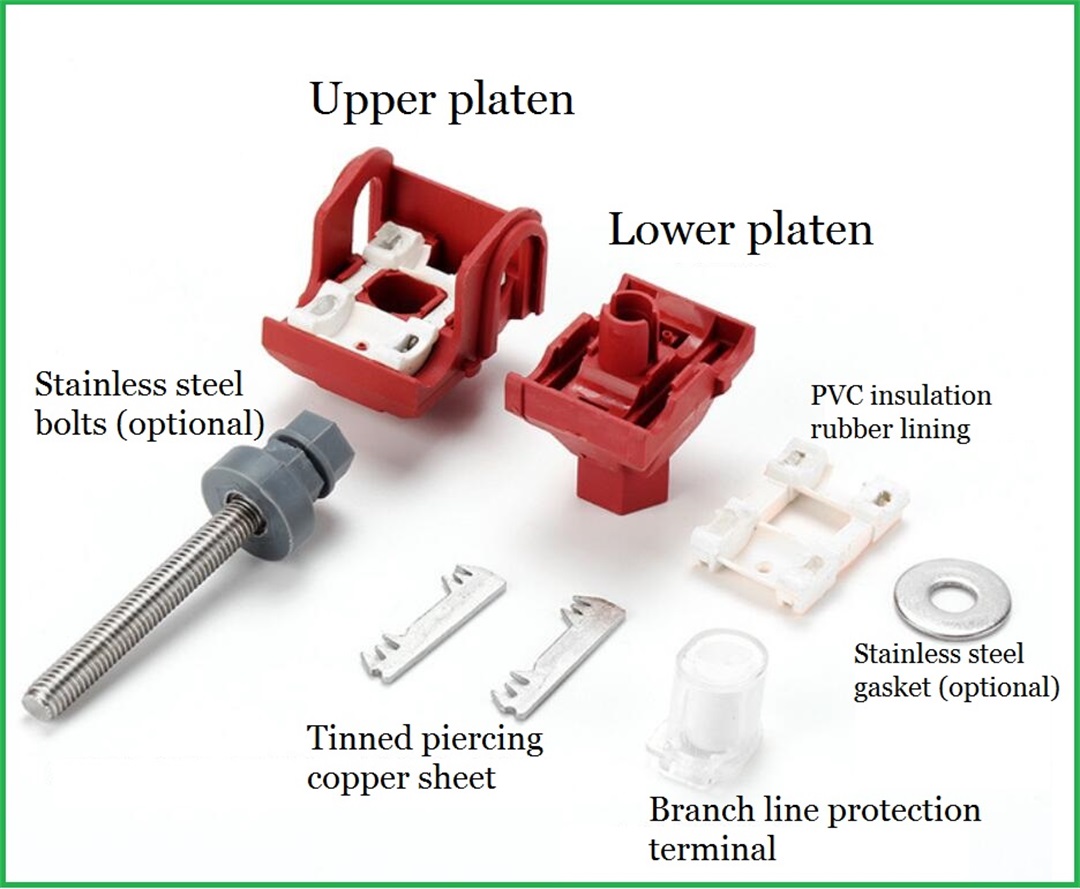
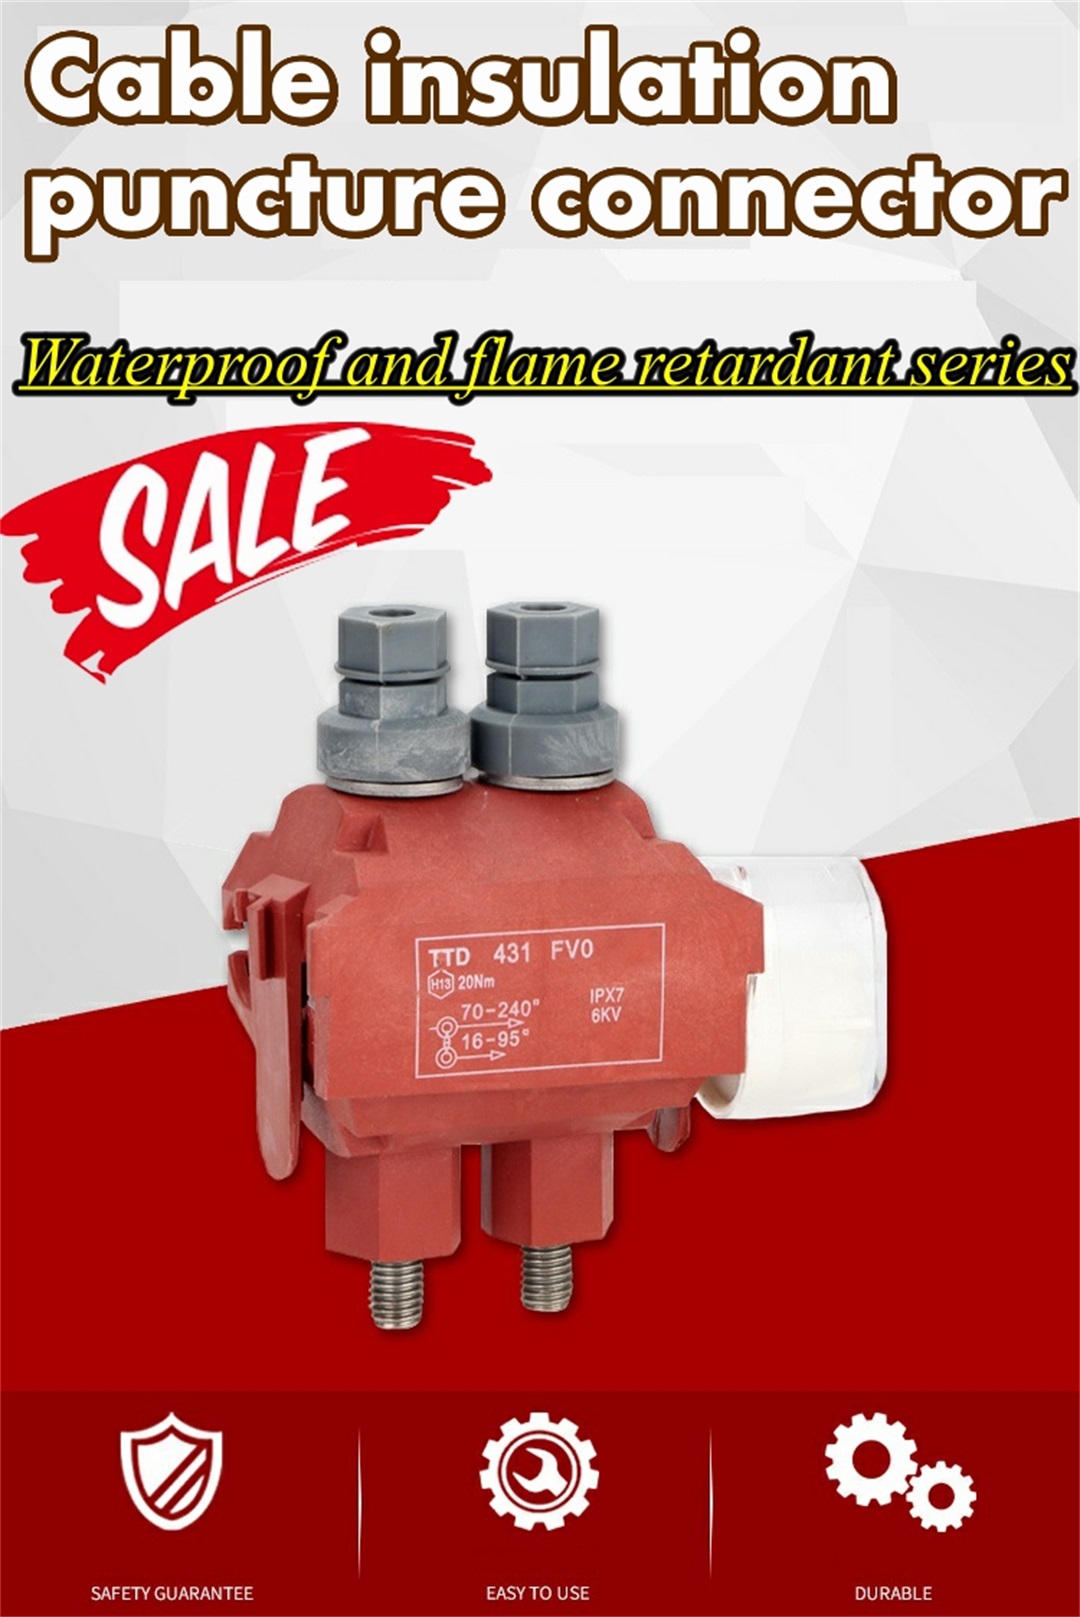
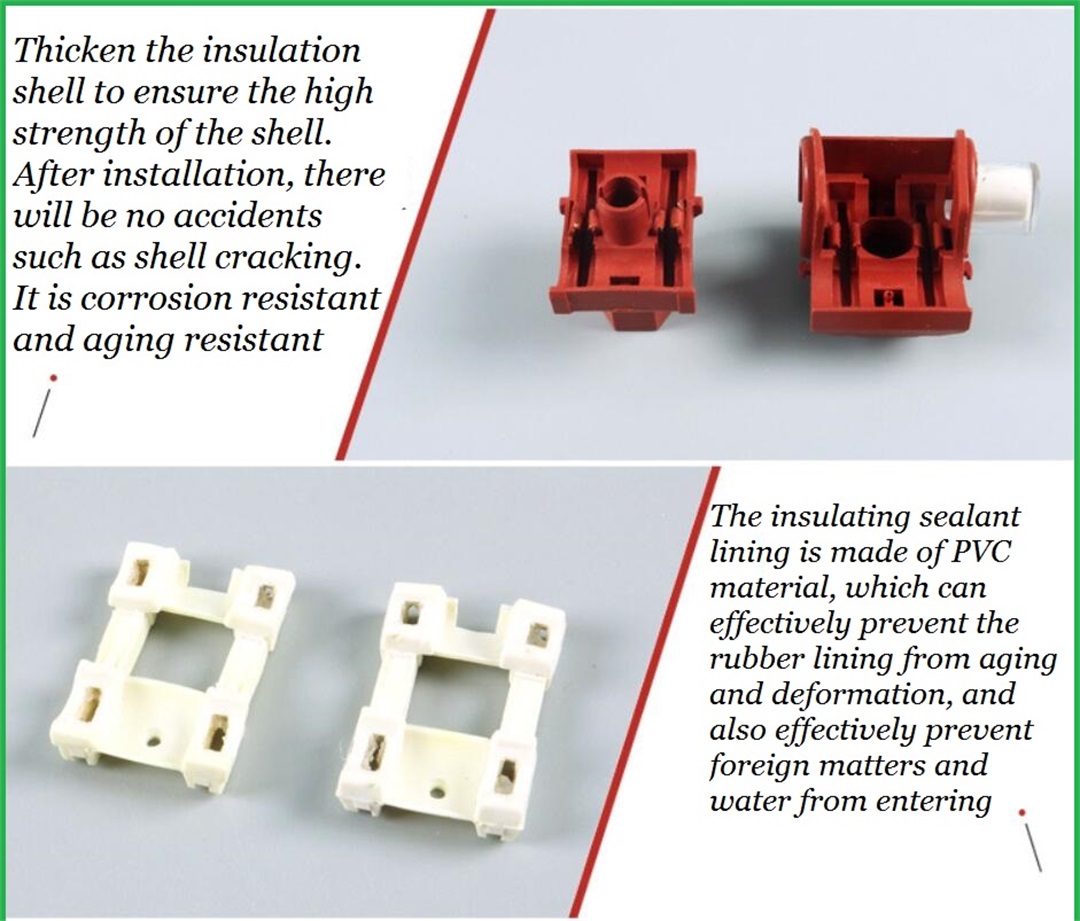
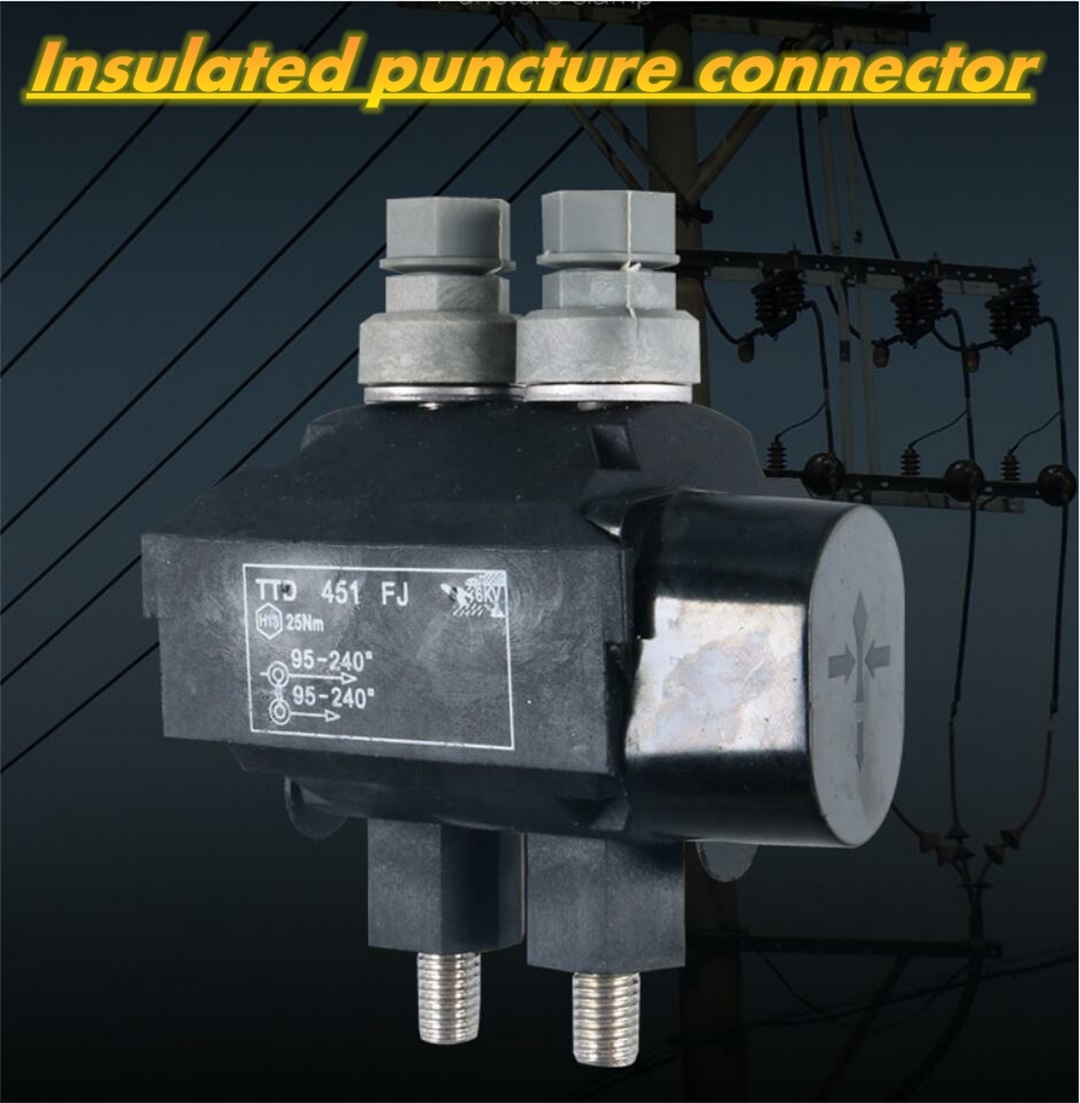
 Structural features: 1. Puncture structure, simple installation, no need to peel the insulated wire; 2. Torque nut, constant puncture pressure, ensure good electrical connection without damaging the wire, 3. Self sealing structure, moisture-proof, water-proof and anti-corrosion, extending the service life of insulated conductors and clamps 4. Special contact blade is used for copper (aluminum) butt joint and copper aluminum transition 5. The electrical contact resistance is small, and it is less than 1.1 times of the resistance of equal length branch conductor, meeting the DL/T765.1-2001 standard 6. Special insulating shell, anti light and environmental aging, dielectric strength>12KV 7. Curved surface design, applicable to the connection of the same (reducing) diameter conductor, with a wide connection range (0.75mm2-400mm2) Product advantages: 1. Simple installation: cable branch can be made without stripping the insulation skin of the cable, and the joint is completely insulated. It is not necessary to cut off the main cable, and branches can be made at any position of the cable. The installation is simple and reliable. It can be installed with electricity only by using a socket wrench. 2. Safety in use: the connector is resistant to twisting, shockproof, waterproof, flame retardant, and electrochemical corrosion aging, requiring no maintenance. It has been successfully used for more than 30 years. 3. Cost saving: the installation space is very small, saving the cable tray and civil engineering costs. For application in buildings, there is no need for terminal box, distribution box, cable return, and cable investment. The cost of cable+piercing clamp is lower than that of other power supply systems, which is only about 40% of the plug-in bus and about 60% of the prefabricated branch cable.
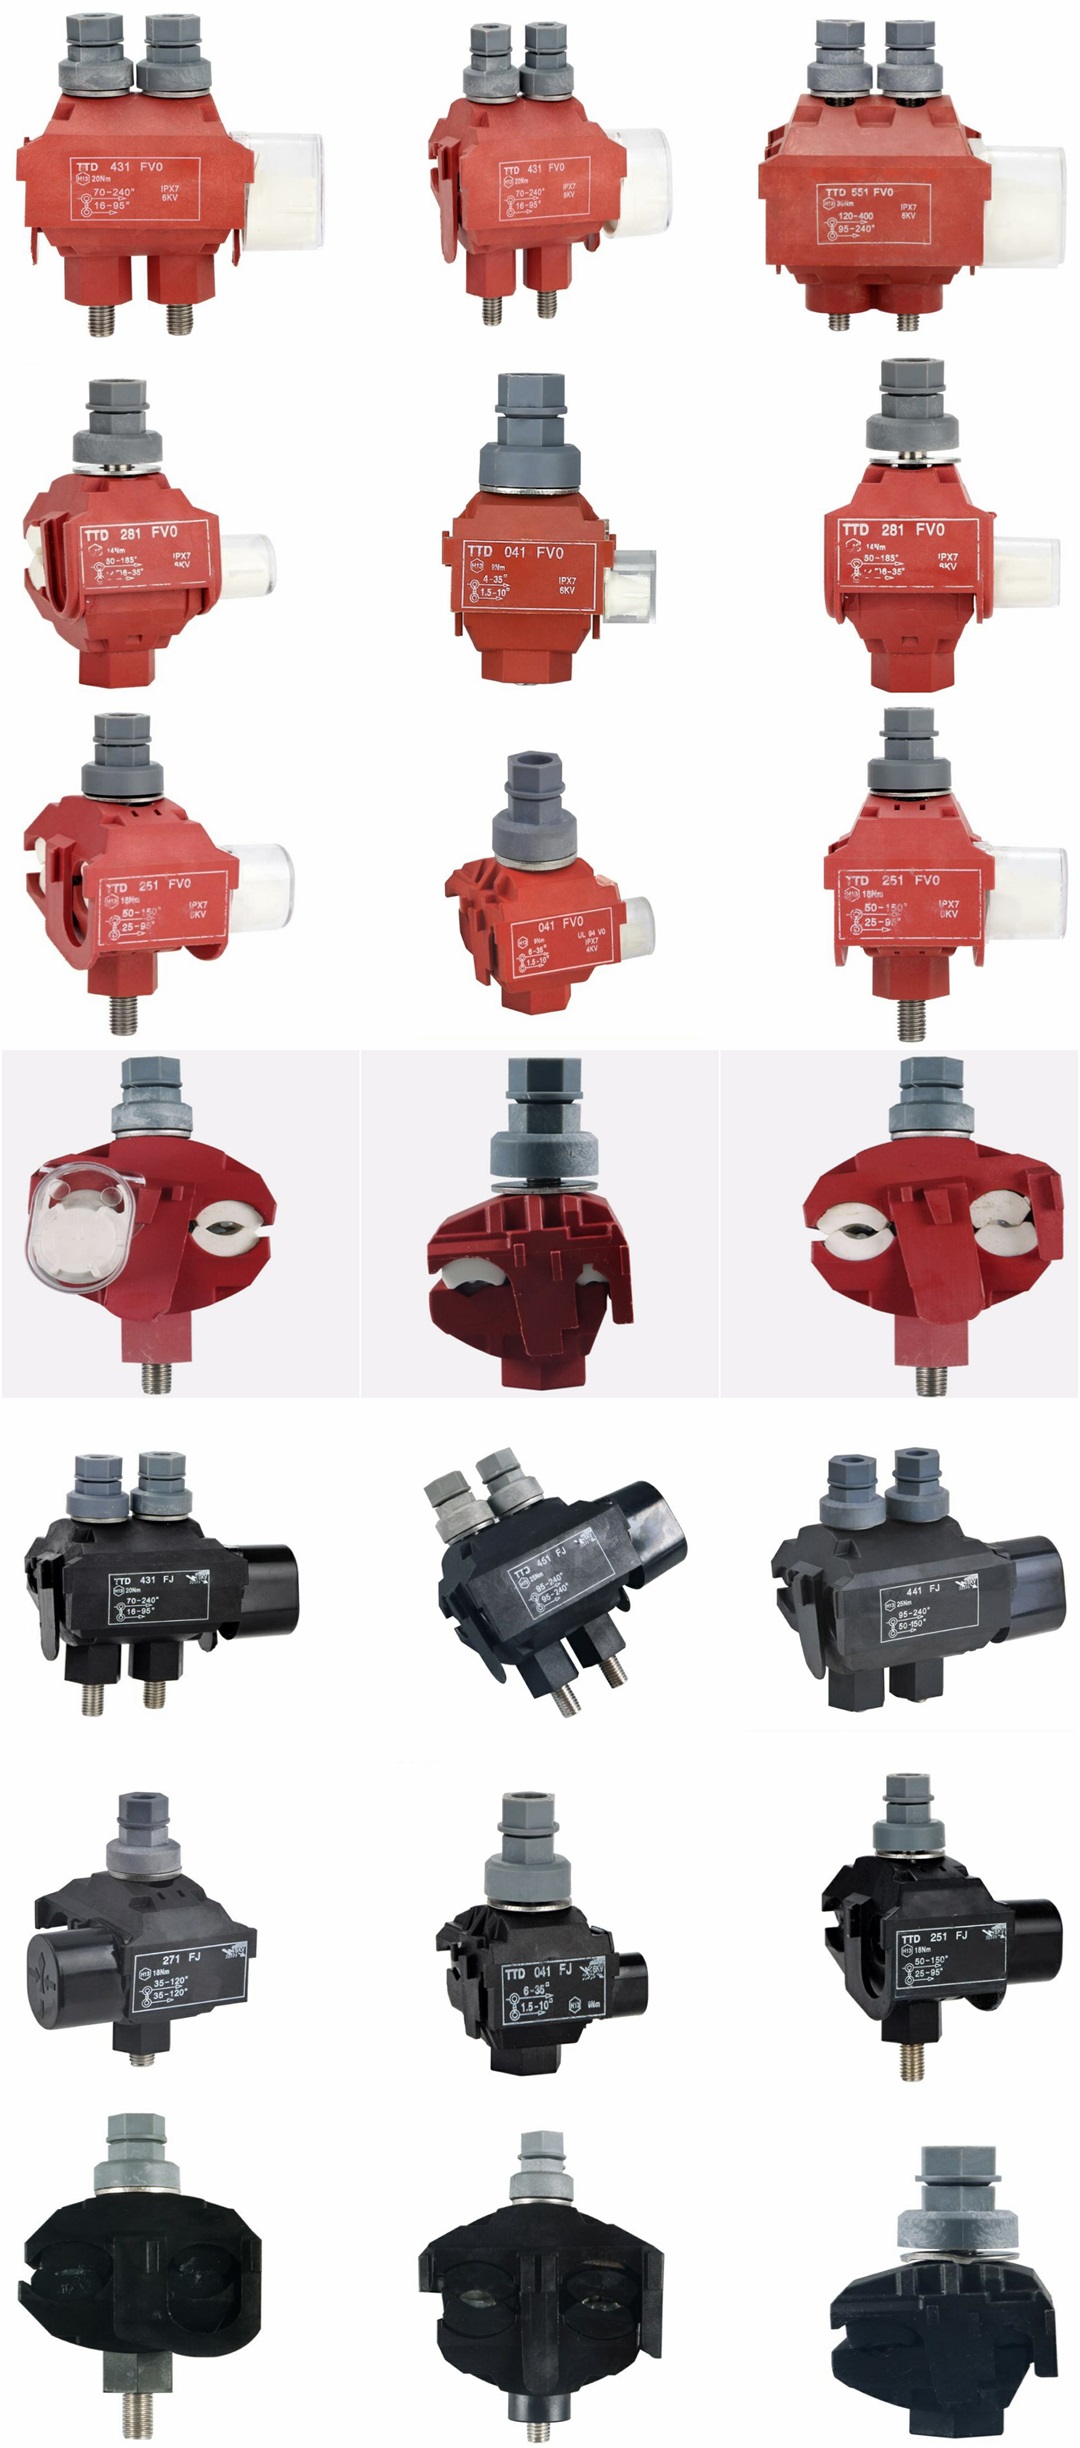
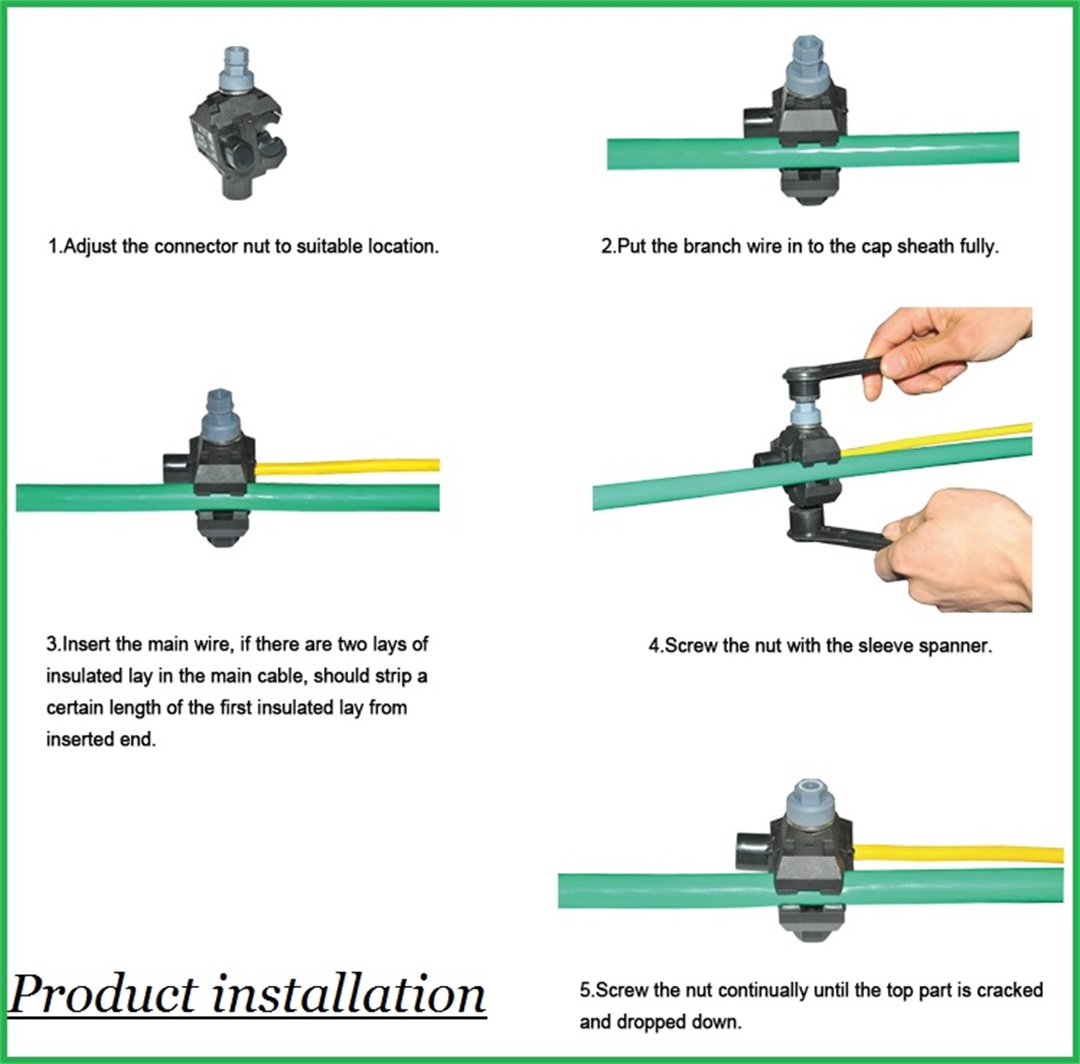
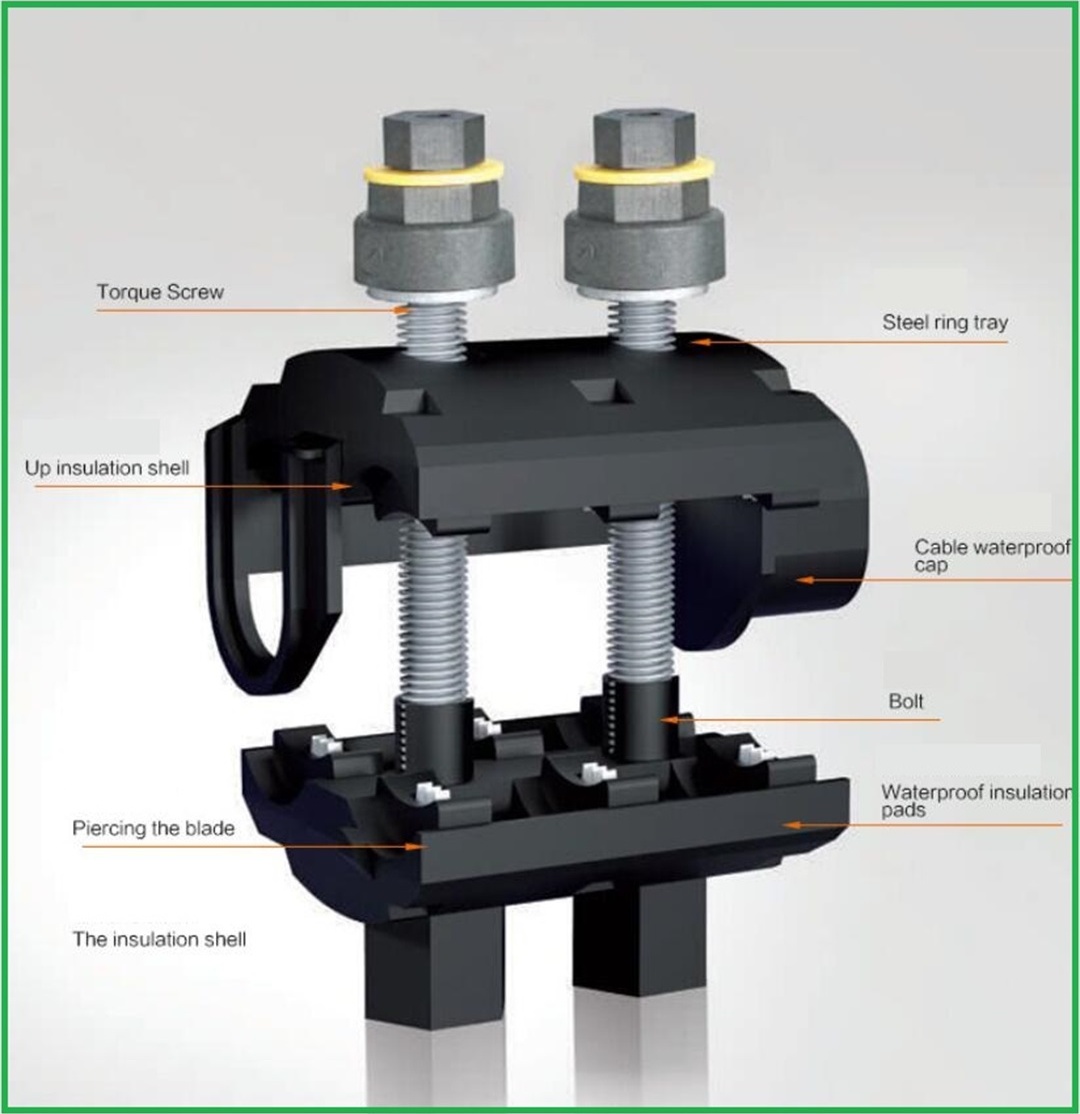
 1. Adjust the nut of the piercing clamp to the proper position, and insert the branch wire into the branch wire cap completely. 2. Insert the main line. If the main line has two layers of insulation, a certain length of outer insulation must be stripped at the connection position. 3. Put the main/branch line in a proper position and keep them parallel. First, tighten the nut by hand to fix the clamp. 4. Tighten the nut evenly with a socket wrench of the corresponding size until the top breaks off and the installation is complete. Installation of the double-screw insulation piercing clamp: 1. Unscrew the clamp first and snap the main wire into the main wire groove. Do not jam the main wire and the knife ruler crookedly. Pay attention to whether the wire diameter range corresponds to this wire clip. 2. Put the branch line into the branch line slot. The precautions are the same as above. 3. Tighten with a socket wrench. Open-end wrenches are disabled. 4. Note that the two nuts should be screwed down synchronously in sequence. 5. When tightened to a certain strength, the constant torque nut is twisted off. The installation is complete.